Simple Techniques For Creating a Monolithic Hybrid
Douglas Frye, C.D.T. — President, Functional Esthetics Dental Laboratory Inc., Farmington, Missouri
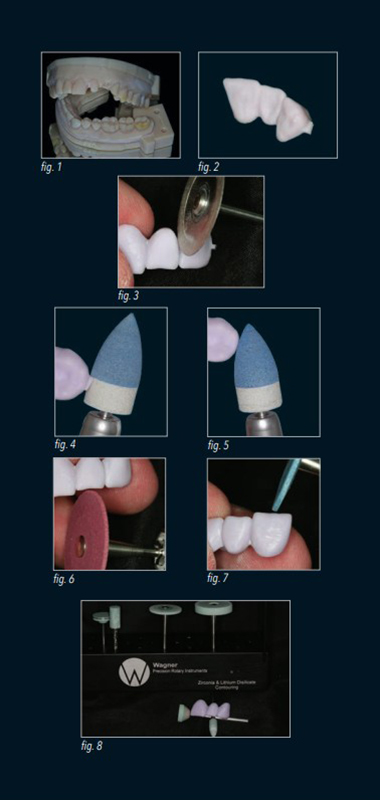
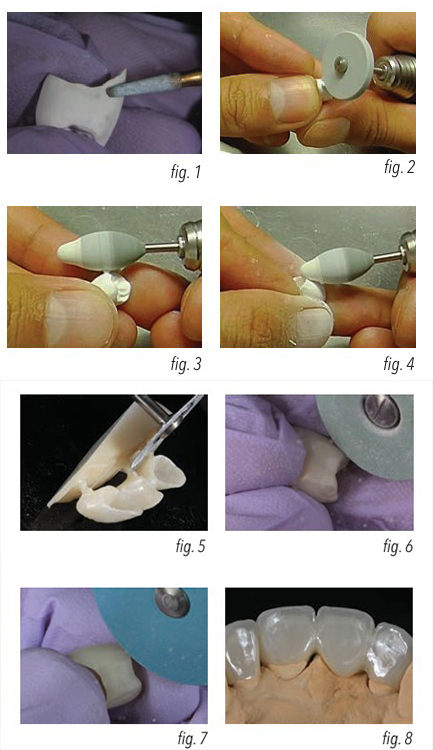
Now that the digital world has become a reality, let’s make the most of it. We are now receiving digital files for printing in-house models (fig. 1), or fabricating monolithic restorations from just the files themselves. With the modeless application, we have been limited to layering techniques for fabricating natural looking restorations. This is now changing...
The available products that can be milled in the dental office or in the laboratory are still changing in the industry. So why not fabricate a much more lifelike restoration following the Monolithic Hybrid Technique? It’s a simple two firing process for lithium disilicate or similar materials, that will set your restorations apart from others.
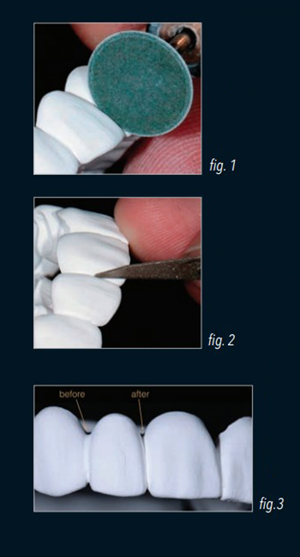
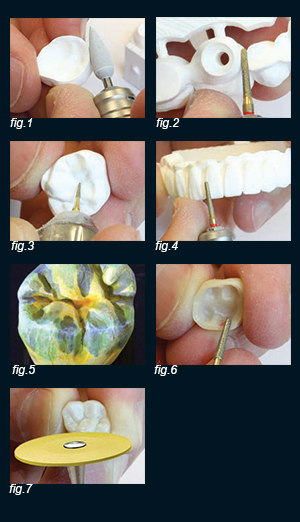
Once the restoration is designed, it then will be milled as a standard monolithic restoration (fig 2). I separate the milled restoration from the block with a ZR19mm diamond disc (fig.3). I use the same disc for contouring the interproximal line angles as well as the tooth formation, creating the ideal emergence. The sprue connector is quickly removed utilizing the diamond infused white section of the SRS 2 Step Sprue removal instrument (fig 4). The top section of the SRS instrument is a BlueBerry™. This top section smoothes the connector/restoration interface (fig 5). After sintering, I use a Diacool™ diamond infused instrument for bulk shaping. The abrasive nature of the Diacool™ is smooth and gentle, thereby eliminating the chipping which one might observe using other types of grinding materials.
The next step in fabrication of “Higher Quality Standard” restorations, is the ability to recreate the surface texture to simulate and mirror the surrounding dentition. The BlueBerry™ and RedBerry™ instruments assist in the contouring and smoothing of surfaces that will mimic the existing dentition. The RedBerry™ is my go–to instrument for bulk reduction. It safely reduces incisal length and helps to create ideal line angles (fig. 6). The BlueBerry™ contains a more subtle diamond. I use this for fine tuning surface texture and creating incisal irregularities for a more natural appearance (fig. 7). The restoration has now been shaped to the ideal size, where surface texture appears natural and mimics the surrounding dentition.
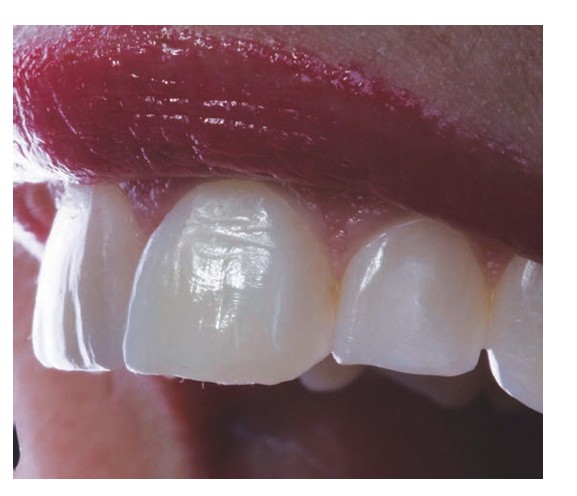
Now it is time to create the “Hybrid” cut–away. We are looking to replicate what is most commonly observed in natural dentition. We understand that color should come from within, rather than from externally placed stains that can produce unnatural results with regard to light diffusion and absorption.
Creating natural looking restorations is always our goal. To accomplish this, I use a Diacool™ 403 or 407 (fig. 8) to create small divots in the surface of the pre sintered restoration to allow
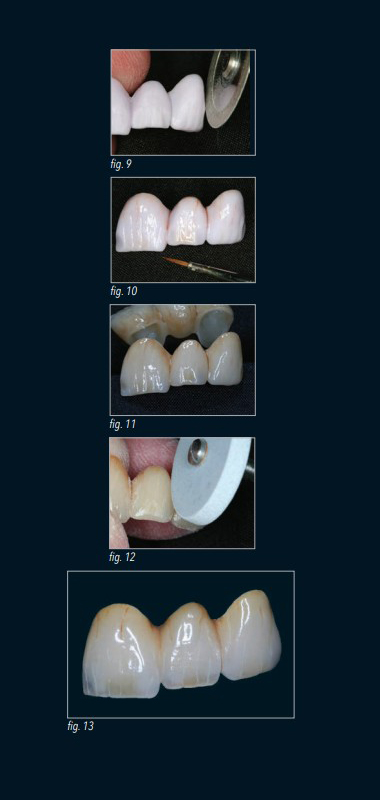
for the ceramic material to be placed. The application of the ceramic material could either be with modifiers or internal staining techniques. I then place cuts at random places on the surface in order to create natural craze lines. (Craze lines are observed 85% of the time in natural dentition). The cuts are made with a ZR diamond disc on a 90° angle followed by cuts at a 45° angle (fig. 9). With surface blemishes in place, we can begin to consider the fast application of internal staining as part of the “Hybrid Technique” (fig. 10). These steps are done as a time saving technique prior to the sintering process.
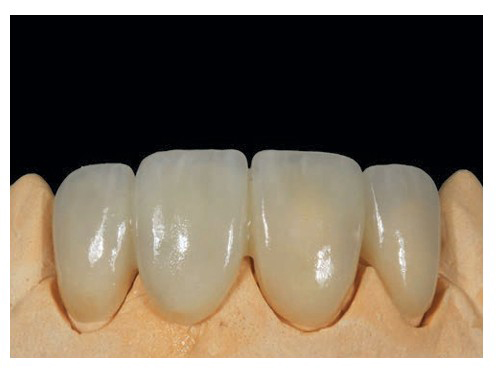
Prior to the second and final firing, a case appropriate ceramic overlay is applied (fig.11). In this situation I used a transparent neutral incisal. Once retrieved from the porcelain furnace, a simple touch up with a silicone wheel (fig. 12), and diamond polishing compound, is all that is required to complete a natural looking restoration (fig. 13).